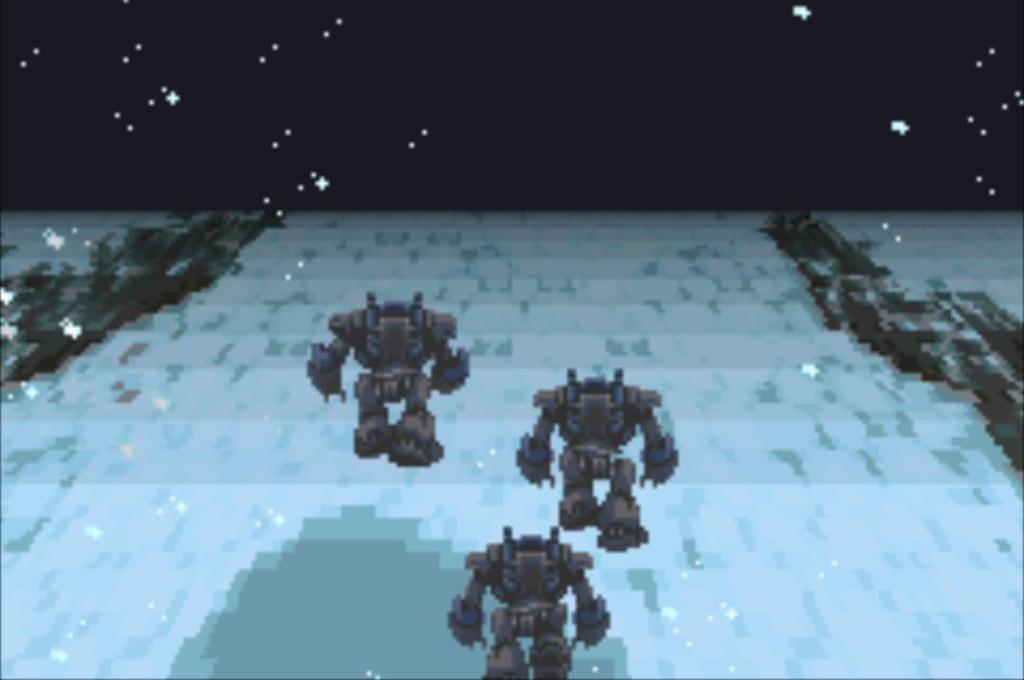
Ask a random person on the street what their favourite Final Fantasy game is.
The most likely answer you’ll get is, “what the {explicit} is a Final Fantasy who are you please leave”
But the second most likely answer is probably Final Fantasy VII, or XIV.
Okay, that’s still not the answer we want.
Unfortunately, the pixel era of Final Fantasy games haven’t evolved into the current times as well as many of us Final Fantasy nerds have hoped. Gone are the days of people using their imagination to envision what the pixels tell us to think. We need the information force fed directly into our neural systems and we need it told DIRECTLY, dammit!
Anyway, a majority of Final Fantasy nerds would probably answer VI. Or V, or X, or, well, okay there’s a whole bunch of them so you’re bound to get a multitude of different answers.
MY favourite is VI. Or X. The answer changes based on the day, but it’s at least top two!
Final Fantasy VI, assuming we don’t count technicalities with MMOs, is the mainline Final Fantasy game with the largest cast. Normally, a list like this can be condensed into a simple ranking system, and I can name you in five seconds the ranking of the characters in FFX, given there’s a whole seven of them and it’s well documented what the objectively correct answers are. Kimahri isn’t high up, if that’s what you were hoping to hear.
With 14 whole characters, it’s a lot harder to objectify which characters are best, especially since most of them aren’t typecasted into a very specific role, while the game offers less linearity and more freedom with how you progress throughout.
And a quick reminder, by the end of the game, as well as some post-game content if you’re playing certain versions of the game, you will need to make three parties of four, i.e. use 12 characters. That means two are certain to get shafted. Coincidentally (not really), there’s two characters in C tier.
So let’s do this right. Within the tier list, we’ll segregate it into four tiers, and base it off multiple things. Remember, the damage cap of the game is 9999, and the feasibility of the character doing it, as well as methods of circumventing it via multiple hits, are very relevant factors to a character being good.
What we WILL be looking at:
- Usefulness throughout all stages of the game
- Available gear options
- General fun-ness to play (i.e. gamebreaking exploits/bugs will not factor in)
What we WON’T be looking at:
- Difficulty/ease to reach a threshold of strength available to you at that stage of the game
- Challenge run usabilities
- Overlevelling
Trust me, unless you already have knowledge of FFVI mechanics, that “Available gear options” caveat will result in a much lower placement for a character that you probably really like. Sorry.
C Tier
The boys in this category are the worst in the game and you have no real reason to be using them, if you’re trying to be optimal. But hey, some people REALLY like the guy who should rightfully be considered the worst character in the game. And I mean, he IS the easiest to use, if you’re not trying to be sweaty
#14 Umaro

Remember, ease of use is NOT being considered here.
Look, okay, I get it. People like the funny yeti man who can throw his teammates at people and wow it does big funny numbers!
In almost any game, characters where you have no agency over are bad, especially in a system where enemies do various different things to you.
That’s Umaro. You can’t control him, he’s the Berserker of the party. You can’t even change his equipment, and that’s the killer. Which to be honest, is a bit of a shame because he does have some of the best stats in your party, but he just can’t do anything with it besides the options he has available to him. The best you can do is give him his two character-unique Relics, which, while strong, doesn’t change that you can’t control him.
Umaro is a very plug-and-play character, which is why some people like him. You just put him in, and he does somewhat high damage. But EVERY character (except the only other guy in C tier) can match his damage, with possibilities if not guarantees of being able to “break” the damage cap by doing those large quantities of damage multiple times.
By the time you get Umaro, who is by the way an optional character, you already have guaranteed access to at least four better characters. There is no scenario in the game for where you ever want to use Umaro, except MAYBE if you’ve completely neglected to put in any effort on some of the characters in the top twelve. I count two that you’d need to put in a modicum of effort into, and one that does require quite a bit more than a modicum of effort.
But above all, Umaro is just not fun. Seriously, respect yourself more. Why remove 1/4 of your entire gameplay to include a completely random factor? If you still really want randomness, just use Gau or Mog.
#13 Cyan

You know, a part of me wanted to put Cyan below Umaro. Cyan is THAT bad.
Cyan’s gimmick is Bushido, a trait that’s been passed down to other Samurais in the franchise like Auron, who, unlike Cyan, isn’t a complete bag of nuts.
What Bushido does is upon activation, a bar begins to fill up from 1 to 8. You unlock more Bushido abilities as you level up, but you only start with 2 or 3, depending on your level. You also can do a side quest that would immediately just unlock all 8 for you. The bar slowly fills up, with each number its below being highlighted to denote the ability that would be activated upon the button press. When you press the button, Cyan unleashes the associated Bushido ability with that button.
Seriously, you have a guy whose gimmick is to stand still and do nothing for a length of time for him to gain access to something that does any reasonable amount of damage. Some of his Bushido abilities do actually do good damage, but so many other characters (i.e. everyone above him) can do the requisite amount of damage in much less time.
Fortunately, you can at least swap and input actions for the rest of your party while Cyan is charging up his ultimate Kamehameha or whatever. By the time you’ve let the rest of your party members finish their actions, Cyan probably won’t be the done charging, and the battle is probably over.
Your best bet with Cyan is to ignore his gimmick entirely. Wonderful.
What Cyan DOES have is probably one of the best weapons in the game. His Kazekiri gives a 50% chance of activating Wind Slash after a normal attack, a fairly powerful Wind-elemental AoE attack. By the way, after a normal attack means that this won’t work if you’re using Bushido, so you just really don’t even want to press the button at all, ever.
The downside? His Magic stat is abysmal, meaning a Wind Slash from him will do about as much as a wet paper towel to Godzilla. So your other option is Zantetsuken, which has a 25% chance of causing Instant Death. This is less horrible than it initially sounds – while your mages can just cast other spells that can perform that almost guaranteed as opposed to having to rely on random chance (which you can also just teach to Cyan, by the way), there’s at least ONE part of the game where you can’t control your character and would actually like to have Instant Death on hand, thus giving Cyan a niche!
The problem is that at that point of the game, you’re guaranteed to have Setzer who already would have access to the exact same thing. Womp womp.
B Tier
I want to iterate going into this tier that Magic is a very key part of FFVI’s core gameplay loop. All characters can learn every spell, however I will never assume that you’d put in the effort to teach ALL characters EVERY spell, but I WILL at minimum assume that you teach some amount of offensive spells to characters who focus on spellcasting. One of them specifically does actually need you to teach them spells as they cannot actually learn spells on their own, as such completely lacks offense without you moving out of their way to teach them spells.
My point being, that if a character has low Magic stat and has nothing else to supplement their damage, that WILL result in them being worse because of it. That brings us to our first boy.
#12 Sabin

Yes, the funny man who suplexes a train. Yes, I know you like him. No, I’m not sorry.
Here’s the scoop. Sabin is the Monk of the party, and his ability is Blitz. You perform a button combination (which if you mess up, nothing happens and you waste his turn), and based on the buttons you press, he does the matching ability.
Look, I’m not even factoring in the fact that I’m a donut and sometimes mess up the button combination because I’m too impatient to actually make sure I make the correct inputs. While that IS frustrating, and is absolutely relevant because remember, I need twelve characters and Sabin is #12, it doesn’t factor in to his low placing.
Sabin has three real button combinations throughout the game you want to press. Aura Cannon, Rising Phoenix, and Phantom Rush (or Bum Rush if you’re an SNES player). Those are his highest damaging options, with Aura Cannon being the early game option, Rising Phoenix being the AoE option in the early game, and Phantom Rush being his highest damaging option in the late game.
Now here’s something you may not have known, as it’s knowledge the game does not divulge to you. All of these are Magic.
That’s right, you want to give Magic-boosting equipment to the big muscly guy who has enough strength to throw a train but not enough to throw a squirrel creature guy for some reason.

(the apparently canon reason is that Sabin has a phobia of these things)
As you can imagine, Sabin doesn’t get access to much Magic boosting equipment. Specifically, none. Not only that, his armor options are lacking. Monks are, after all, not trained to wear armor. So despite being made of raw muscle, he’s one of the squishiest options you have available to you.
You CAN actually make Phantom Rush do 9999 damage, which is the damage cap. The problem is that he only does it once, and other characters will have means of doing it more than once.
Sabin’s biggest saving grace is that there is one part of the game where he’s a good option to bring. You lack access of teaching your character’s Magic just yet, and out of 6 options, one of them is Cyan. Sabin’s Rising Phoenix is decent for clearing random encounters, but he’s still the third best in that scenario, below Gau and Edgar. And a bit later on, two other characters are FORCED into your party, so Sabin becomes the third best option who ultimately doesn’t fit in, unless your lazy ass decides Gau isn’t worth the effort. Hm, foreshadowing?
#11 Shadow

Boy, I’m just angering a whole bunch of people today, aren’t I?
Shadow is your resident edgelord, which automatically means people LOVE him. And to be fair, in the “resident edgelord” trope that video games love to have, Shadow is one of the well done ones. FFVI isn’t a masterpiece for nothing, after all. But I digress.
Shadow is the Ninja of the party, so he comes with Throw. I’m not at all factoring that you need to spend money to purchase the things he has to Throw. Essentially, you purchase things to Throw, and Shadow Throws them for damage. That’s it, and the damage is very decent for the first half of the game.
He also has an additional gimmick where his dog, Interceptor, will sometimes come in to block an attack, and counterattack afterwards. It’s not a HUGE deal, but it’s worth mentioning.
There’s one stage of the game where Shadow is forced into your party, and I’d honestly say he’s probably one of the best characters you would want to have at that stage of the game. You’re not making an active choice to put him in your party there, unfortunately, so that doesn’t really give him extra boy scout credits.
Like Sabin, Shadow doesn’t really require much effort for you to get him going. You just need to buy the stuff and he does his job. Unlike Sabin, he has decent AoE options, as well as a powerful single target option, both within Throw, with the caveat that the AoE option is Magic while the single target option is Physical, so you’ll have to choose between both for his equipment. The unfortunate thing is that, also like Sabin, this is only one instance of damage, so you’re not going to be doing more than 9999.
Speaking of equipment, Shadow also does get access to better equipment. Despite being a Ninja, he’s more similar to some of the other members of the party and is just… defensive. But he can take hits better than Sabin, so points there.
I actually do like Shadow, but it’s just a situation where the rest of the party is better. Also, there’s a legitimate real chance that you lose Shadow permanently for your playthrough, and it’s VERY easy to make that mistake. I’m not telling you when it is, I’m just telling you it CAN happen, and if you don’t do research prior, it probably WILL happen.
#10 Strago

Strago is the Blue Mage of the party, and his ability is Lore. When he gets hit by a monster’s attack, if it’s part of his Lore learnset, he will learn the ability and get to use it for the rest of the game.
This is, unfortunately, less impressive than it sounds on initial inspection, because Lore is inferior to Magic. Even if you know where all the Lores are, there usually isn’t much reason to cast most of them, with the best one being Mighty Guard to set up defenses against a boss. Delta Attack is neat, but is ultimately weaker than, well, Ultima.
As a fun fact, I did say he had to get hit by a monster’s attack to learn their ability, but Mighty Guard is a defensive ability, so how do you get a monster to thwack you with it? The answer is with either Relm or Gau. You either Sketch it, or Rage it. The problem is you don’t actually ever see any monster cast Mighty Guard, so it just happens to be a part of their ability set despite you never seeing it. So in a normal blind playthrough, you’d NEVER know about this. The monster in question is Land Ray, by the way.
His defenses are also quite weak. It’s more forgivable than Sabin because he’s SUPPOSED to be a frail old man, saving the world from a murder clown at the ripe old age of 70.
His biggest saving grace is that, by way of equipment and still being a mage, he has a high Magic stat. This makes him inferior to the characters who actually focus on just spellcasting due to their associated gimmicks or other factors with it, but still better than our previous four friends.
There’s really not too much to say about Strago. You’re basically just using him as a spellcaster, which other characters do better, but being a spellcaster in it of itself is already enough reason to be good.
#9 Gogo

Gogo is a very hard character to evaluate. The first thing is that, like Umaro, they’re only available in the second half of the game, and unlike Umaro, you’re not likely to find out where they are without prior knowledge.
The second is that, as the Mime of the party, their gimmick is that they can equip the abilities of all your other party members. That means they (hint hint) get access to Rage. Hilariously, your next best options are probably Blitz from Sabin or Throw from Shadow, and we’ve already discussed those, because the characters after this point have extenuating factors that make them stronger than those we’ve already mentioned.
They also have Mimic, which just copies the previous action that a party member took. It’s not bad per se, but it follows their equipment, so the best thing you could realistically copy is a Doublecast Ultima, which Gogo doesn’t really have the highest Magic stat for you to make use of.
Gogo’s equipment is also unfortunately quite poor. They do get the Magus Rod like Strago and Relm, which does give them a nice boost to his Magic, but it still leaves it at a fairly pitiful state, and their defenses aren’t too much different from Sabin’s.
So what makes Gogo go?
Sheer utility. With access to almost all abilities, you can build them however you want, which is not irrelevant. In situations where you have multiple parties, you get an extra instance of Steal. You can give them Sketch to help out with Strago’s Lore-learning, not to mention you can give them Lore itself for Mighty Guard, if that’s your fancy. And most importantly, Rage. They get Rage.
I can’t elaborate on Rage just yet, but seriously, having access to Rage already pushes Gogo past everyone before them, even ignoring the other aspects, although it is quite hilarious that Gogo can Blitz better than Sabin can due to equipment.
Admittedly, however, by the point of which you can get Gogo, Rage isn’t AS broken as would have been earlier in the game, plus they can’t abuse it as well as Gau can due to Gau’s better equipment options. Ultimately, their piss poor stats prevent them from getting a higher spot.
A Tier
This is the most populated tier. In fact, I’ll spoil it right now, 7 of the 8 remaining characters are here. Quite impressive that a game this old has actually fairly decent balancing, when you think about it.
The characters here do one of two things in the late game.
The first is that they’re great at Magic, and the three characters that fall in this category happen to have fantastic equipment to go with this. This also means that they’re the best options for Doublecast > Ultima, perhaps along with a Quick if you’re playing certain versions of the game. Quick lets you take two actions in one turn with no interruptions, so that’s four triggers of the damage cap, but Quick is only available in the Advance version of the game and NOT the Pixel Remaster, so I won’t count on you having it and thus it will not be evaluated. You could have casted Quick on Cyan to circumvent the timer on Bushido, but :p
The second is that they have methods of circumventing the damage cap of 9999, and can do it fairly reliably. Simply put, they have reliable means of accessing multi-hits, and most of the time it’s at least four hits.
Even putting that aside, in the first half of the game where you don’t have complete and utter freedom in what you want to do, they still provide adequate amounts to your gameplay that you can’t fault them.
#8 Relm

Remember when I said there was a character who NEEDED to learn Magic to be good? Here she is.
Relm’s gimmick is Sketch. She’s the Pictomancer of the team, and to my knowledge, the only one in a non-MMO mainline title game. Sketch is fairly complicated, but in essence it just uses an ability that the Sketch’d monster would have been able to use, or is within their ability set, like the aforementioned Mighty Guard. This is quite random, and not great as most attacks an enemy can do would not be enough to kill them. You’d rather just cast a spell, but it DOES help with learning Lores for Strago.
Let’s also address the elephant in the room. Don’t EVER use Sketch if you’re playing on the SNES version. If Sketch ever misses, it causes the infamous Sketch bug, which can corrupt your save file or your entire game. I don’t even know how that got past QA, but it’s not worth the risk. In fact, you might even want to consider just not ever using Relm so you don’t butterfingers it.
So what makes Relm specifically higher than the rest?
She has the highest Magic stat in the game.
Yes, HIGHEST. As in, higher than the 70 year old Magus who, throughout his whole life, knew magic. Higher than the person who is literally half magical-creature. Higher than the woman who had magic infused into their body as baby. This 10 year old child puts all of them to shame.
This is also where I might want to mention that the way you learn Magic is by equipping Espers, which as you gain Magic AP from completing battles, you learn Magic at a varying rate. Espers also have the additional benefit of increasing a specific stat as you level up while you’re equipping them, based on the Esper that you equip. This means that you CAN technically just raise the Magic stat of the characters you want to use and use them as your resident spellcaster. This is lame and boring and I already mentioned we would not be factoring in overleveling, so poopy poo poo Relm is not doodoo.
The caveat here is that, of course, you HAVE to teach Relm spells. She’ll cast them better than any other character in the game, but there’s some level of effort that you need to get her to that point, but it’s really not difficult.
Oh yeah, and she’s great on the equipment side of things too. The first thing to mention is that she has a Relic she can equip, the Fake Moustache, that changes Sketch into Control, which DOESN’T suck complete ass. In fact, it’s pretty good, as it can turn any random encounter of only one enemy into a cakewalk. Control is essentially Sketch, except YOU choose what ability you use, and it ends when you use one of the abilities. This means the monster will not take a turn if YOU don’t take a turn.
Most of the time, this is slower than just using a spell with Relm and ending the fight, since Relm is very capable of that. But against some REALLY powerful enemies, this can and will single-handedly win you the fight. I’m talking about the Brachiosaur, the infamous Warmech-esque super encounter enemy of the game. No matter how experienced the player, Brachiosaur has the potential to cause you a Game Over, and Control minimizes the risk of it the most. This is especially poignant since the place where you find the Brachiosaur, the Dinosaur Forest, is the best EXP farming zone in the game.
Relm also gets access to the Cat-Ear Hood, which is exclusive to her, because she’s a child. No teenage girl nor adult or otherwise man will ever be seen wearing such an accessory in 1994. What the Cat-Ear Hood does is provide a 50% resistance to all elements, boost all her stats including Magic, and double all Gil drops. Interesting that the token Gil doubling equipment is on Relm and not Locke or at least Shadow, but that’s another feather in the cap for our resident child.
#7 Setzer

Setzer is the Gambler of the party. I’m not keen on referring to Gambler as a Job, but oh well.
Setzer’s signature ability is Slots. It’s about as unreliable as it sounds – just kidding, it’s not, because the game has been figured out to an extent where you can manipulate it such that you always get the best option and roll a triple 7, which is Joker’s Death. This option works on almost all bosses, and does exactly what you’d imagine – it ignores resistances and causes Instance Death on all enemies.
Hilariously, you can also roll 7, 7, and BAR, which casts Joker’s Death on your party. Yes, that means you get a Game Over. Yes, it’s hilarious. And no, I’m obviously not evaluating Joker’s Death here.
If Slots land on anything except a whiff (which results in a weak healing spell for you), it usually does result in fairly decent damage, but if you’re playing fairly, you can’t rely on it, so Slots is dogwater. We’re not pressing it.
Fortunately, Setzer DOES get access to the Heiji’s Jitte Relic fairly early on, which replaces Slots with Gil Toss. You spend your hard-earned money to deal damage to the enemy, but it’s actually a fairly reasonable amount of damage. This is NOT why he’s evaluated highly, but for the period of the game where you don’t get access to what makes Setzer so great, this is a perfectly valid method of dealing adequate damage.
Ultimately, for the first half of the game (in which he joins your party pretty late), he’s not the greatest, which is why he lands fairly lowly in the A Tier.
But when you get him in the second half, he gets access to two very core pieces of equipment that pushes his damage output to the stratosphere.
I’m talking about the Fixed Dice, and the Master’s Scroll. Let’s talk about the Master’s Scroll first, because it’s important for not just him, but for at least one other character coming later.
The Master’s Scroll is simple. When you press the Attack command, instead of attacking once, you attack four times. In exchange, the damage dealt is halved each time.
The Fixed Dice does damage based on an annoying calculation that I’m not going to go through here. Setzer throws three dice, and bigger number, more damage, and if you land duplicate numbers, the damage is multiplied further. What’s important is that the damage you deal here is NOT affected by the halved damage from the Master’s Scroll, which allows Setzer to deal an astounding amount of damage. You will almost definitely consistently be doing more than 9999 damage per attack.
By the way, I know the Fixed Dice is only found in Kefka’s Tower, but there is literally nothing stopping you from just heading over there immediately when you get access to the airship, collecting it, and leaving. Sure, it’s kinda immersion breaking if you’re going to do that, but that doesn’t go against our rules! If that upsets you, kindly take a look at this barren land and understand my implication.
Gear wise, Setzer isn’t the greatest, being around the same level as Shadow. But what you CAN do is set the Imp status on him, and then equip Imp specific equipment on him. Normally the Imp status messes with your equipment, but it doesn’t affect the Fixed Dice. What this results in is that he can hit the maximum of 255 Defense, which in this game means physical attacks deal 0 damage, and he also gets 234 Magic Defense, which is astoundingly high. The downside being that you don’t get to see his admittedly very cool design, that he can’t equip the Ribbon, which can be crucial for some fights, and that he can no longer use Magic, which isn’t really a big deal. You can cover for that with the rest of your party.
#6 Mog

I’m not sure if avid knowers of FFVI will be happy with this placement of Mog, as in, they may want him HIGHER than #6. I’m also not entirely sure that there isn’t some level of bias there because Mog is adorable and we all want cute things to be good.
I digress. Mog’s ability is Dance, as this cute little Moogle is the Dancer of the party. Mog learns Dances simply by being in an area that has a similar name to the Dance in question, i.e. to learn Earth Blues, you go to a mountain. To learn Water Harmony, you go underwater, which just to note, is missable! Joy!
Then you select your Dance, and there’s a 50% chance it fails if you attempt to use a Dance that doesn’t match the background. When your Dance succeeds and it isn’t the same as the associated area you’re in, the background changes to match the Dance, which is neat. Then, as you Dance, Mog becomes uncontrollable, and begins using abilities from a pre-set list based on the Dance you selected.
This, to me, is where I imagine I’d disagree with some players. The uncontrollability of Dance is a frustrating prospect to work around with, which is especially annoying because in basically most of the first half of the game, it’s your greatest source of damage. Not to mention, Mog joins your party at an inexplicably high level, so his damage is even more inflated than it should be compared to the rest of your party.
Don’t let that shy you away from the power of Dance. Mog is strong, and deserves this placement with how many fights he can trivialize in the aforementioned first half.
In the second half, Mog switches jobs as Dance’s damage doesn’t scale very well. Instead, he becomes a Dragoon!
Sans the armor, Dragoons in this game function similarly to Dragoons in other installments. You jump, you land with bonus damage, wahoo. To become a Dragoon, you need to equip Dragon Boots on their Relic slot, which replaces the Attack command with Jump.
What makes Dragoons strong is the Dragon Horn relic, which causes the Jump command to end in them landing multiple times. Combine this with the Holy Spear weapon, which gives a chance of casting, you guessed it, Holy, when you land an attack. This actually results in probably the easiest high damage setup in the game, with the downside that it takes awhile to land, so it’s not much use in random encounters, while also preventing you from equipping a Ribbon, although you’d presumably be in the air most of the time anyway.
Jumping also helps you avoid certain mechanics that would otherwise result in certain death, most notably on-death trigger attacks, although the timing on that is difficult.
But Mog’s equipment is where he truly shines. The Molulu’s Charm Relic, which prevents all random encounters. This is quite hilariously cheese-able since you can get this very early on in the second half of the game where you have complete freedom, meaning you can loot to your heart’s content as long as there’s no boss waiting to punch you in the face. It also allows you to run a Mog-only party in certain parts of the game where you need multiple parties, both saving you time and removing the necessity of bringing a weaker party, though I would advise against this since you’d be losing on some much needed EXP.
Mog is also one of two characters that can equip the Snow Scarf. Well, three actually, Umaro has an unremovable Snow Scarf on him, but you can’t give him anything to make use of it. Minus Imp strategies as mentioned with Setzer, Snow Scarf is the only way to hit 255 Defense, which means Mog, against certain enemies, is essentially unkillable. The other character that can equip the Snow Scarf?
Gau.
#5 Locke

Locke is the Thief of the party.
Sorry, tReASuRe hUnTeR.
His command ability is Steal, which does exactly what it implies. You steal an item from the enemy. Steal is very hard to evaluate, since it’s not TECHNICALLY exclusive to him since Gogo can also do it, and the times at which its most relevant is in the second half of the game.
I still rate it highly, as there’s still some fun strategies like Stealing four sets of Gaia Gear in the first half of the game to gain immunity to some very annoying attacks while spamming your own Earth-based offense, or just stealing Celestriads or Ribbons which are otherwise in limited quantity.
Steal does fortunately save Locke for its sheer utility, because otherwise he’s actually fairly weak in the first half of the game. His Magic stat isn’t high and his offensive options are fairly limited. There’s an exploit where you equip a Brigand’s Glove on him, which changes Steal into Mug, making him do damage along with attempting a steal. Then you equip the Ultima Weapon on him, which does more damage the higher your health is, but is bugged to just have a base stat of 255 when you use Mug with it. Yes, that’s the highest possible number it could be, but the damage is still less than what most of your party can do at that stage of the game.
The second half of the game, Locke is a different beast. While he’s probably the hardest character to re-acquire, he makes up for it in sheer firepower. Remember Setzer’s abusing of the Master’s Scroll? Locke can do that, but more consistently, at perhaps more risk. For he gets a weapon known as the Valiant Knife, which ignores defense, and does more damage the lower his life gets. He can very easily hit the damage cap with this, and if you’re willing to run around with him at low HP, he can thwack for 9999×4 consistently. Note that it’s based on his actual max HP and current HP difference and is NOT percentage based, so you’d equip HP boosting equipment on him.
There’s also the somewhat popular see-saw Locke build, where you equip a Genji Glove and Master’s Scroll on Locke, then equip the Ultima Weapon and Valiant Knife, so your damage is kinda sorta similar since one weapon changes damage based on how high your health is, and the other one is the opposite. It’s alright and admittedly fun to see him swing 8 times with a press of one button, but I prefer just having a Ribbon or Muscle Belt on him.
This is also where I want to mention that you only get ONE Master’s Scroll throughout the game. The only repercussion of this is that you can’t have Locke and Setzer on the same team, as your party fortunately have a magical portal between them that you can use to swap equipment around even as they’re in separate parties. Just unequip it on Locke and move it to Setzer in another party.
Speaking of Equipment, Locke is unfortunately unremarkable, not different from Setzer, while being unable to abuse Imp shenanigans. But with the highest non-Jump damage option in the game coupled with the utility of Steal, I’d say he can stay on this spot.
Also notably, Locke is one of four characters that can equip the Lightbringer, the best piece of gear in the game that is also not really realistic for you to ever have, given you need to give up the Ragnarok Esper for it, which is what teaches you Ultima. The only alternative to get Ultima is to get the Paladin’s Shield, which is an effort I wouldn’t wish on anyone. Lightbringer gives a chance to cast Holy on attack, and along with very good stat boosts, also boosts Evasion, probably one of the best stats in the game.
That said, unless you’re playing on a version with the postgame where you can steal unlimited quantities of it from the final boss (which hey, you need Locke to do!), you’ll probably never get your hands on it. It doesn’t change my evaluation of Locke, though, mostly because the next three characters also have access to the Lightbringer :p
#4 Edgar

Kinda weird that the first few characters we see are the highest on the tier list. We haven’t even gotten through Terra yet!
Edgar gets this placement from his sheer strength in the early to mid game. He goes from the best character to the second best character until you meet Mog, and even that is arguable. With me, specifically. I’d bring Edgar any day.
Edgar’s special button is Tools. The King of Figaro is for some reason a Machinist, but hey if it works it works. There’s not too much gimmick behind Tools, you purchase items that Edgar can use in combat, which unlike with Throw, are unlimited use.
Auto Crossbow/Bioblaster is absurd in the early game. When Edgar’s turn comes up, the battle ends. No other character barring maybe Sabin can do this, but Edgar is with you for longer, and Sabin needs to reach level 15 to gain access to Rising Phoenix.
Drill/Chainsaw are probably your best options until the tail end of the first half. Drill being the more consistent option, but Chainsaw does a crazy amount of damage, at the cost of having a 25% chance of him deciding to be a movie fan and wear a Jason mask to commit an Instant Death attack, which as you can imagine is useless against bosses.
Then he gets Air Anchor in the second half of the game, which can be used to gimmick at least one fight. The first turn, it does nothing, but when Edgar’s turn comes around again, you trigger an unblockable Instant Death attack, that doesn’t ignore ID immunities.
And what does Edgar do in the second half? Well, he’s a Dragoon. I already covered that with Mog, so I’m not doing it again.
His defenses are the same as Locke/Setzer/Shadow. I’ve ran through it enough times, you get it.
Now, admittedly, Mog is probably better than him at this job, because Mog has access to the Snow Scarf, but in the end, since they’ll be in the air most of the time, it’s not a huge difference. Mog is just better as insurance, but Edgar’s sheer power in the early game makes up for the difference in ranking.
Edgar also gets access to the Lightbringer, but because he should be Jumping, he’s not going to be the one holding it.
#3 Celes

We’re in the top three and we’re FINALLY at the point of one of the two remaining girls in the party. That’s right, what we unfortunately don’t have in quantity, we have in quality. Well, they’re both basically the main character, so it checks out.
Celes’ big special button is Runic. If Celes equips a Runic capable weapon (basically a sword), she can use it, and the next instance of a spell cast is nullified and returns to Celes as MP. This doesn’t work on every spell, but it at least works on most, including Ultima. It also includes your own spells, so you do have to time it.
Runic is perhaps rightfully hated by casual players, due to needing prior knowledge of an enemy’s abilities to make use of it. Conversely, if you’re more experienced with the game, you probably know of methods to take care of the enemy in question more efficiently than using Runic. There ARE uses for it, but ultimately Runic is not the reason Celes is this high.
Celes is one of three dedicated spellcasters in the group, although unlike Relm, she can at least learn some on her own. This means if you’re horrifically against the idea of using Espers (which to be fair, is a challenge run that exists), Celes is one of three characters that can give you a healing option, and one of two where the option is reliable. The unreliable one being Strago, as I’m not fond of trusting White Wind.
Then if you’re a normal human being and are willing to teach her spells, then she becomes a great user of them, which we already covered with Relm. She’s just a bit worse than her at it.
I’ll take this opportunity to talk about the Soul of Thamasa Relic. This replaces the Magic option with Dualcast, which I already covered a few times. Dualcast is very obvious in its naming convention and I really don’t want to question the intelligence of my dear reader. You only get one Soul of Thamasa save for a very late point in the post-game which not all versions of FFVI even have, so similar to the Master’s Scroll, you’d probably want to be passing it around between Celes, Relm, and Terra.
Until you acquire Espers, Celes admittedly doesn’t impress very much. Magic is good enough for some weaker AoE options than what you have, but she does provide the utility of healing, which is very nice, especially if you’re like most people and absolutely refuse to use items until after the final boss.
Now to talk about her equipment, and this is where Celes cracks all known conventions of fairness. Celes is a woman, and as such, gains access to woman equipment. What is woman equipment?
Woman equipment is the Minerva Bustier. This is, bar none, the best piece of armor in the game. The wearer gains resistance to Water, Earth, Holy, and Poison, i.e. only takes 50% of damage. The other elements? Nullified. Not only that, it gives an all around stat boost, including a +4 to Magic, and an MP boost.
But woman equipment doesn’t end there, because why would it? They also get the Mystery Veil, which gives even more Magic, along with an all around boost to stats, including Speed.
This gives Celes incredible resilience, better than every other character we’ve seen so far. You can even run an alternate setup where she gets 129 Magic Evasion, i.e. all spells will automatically miss unless it’s a guaranteed hit, like from Ultima. Sure, she lacks the raw single target damage output of someone like Locke, but she wins in basically every other category.
Lightbringer is also woman equipment! And while Locke would probably want to stick with the Valiant Knife and Edgar wants his pointy stick, Celes would actually use it since it comes with a Magic boost. Funnily enough, it actually gives the same amount of Magic as Enhancer, which is much easier to acquire, but the other stats it provides does make it ultimately superior, if unnecessary.
#2 Terra

Our resident cover girl, though not really more of a protagonist than Celes. About equal, really.
Terra’s button isn’t immediately revealed to the player, but I do have to evaluate her, and it’s Trance, or Morph. Trance transforms Terra into a different form, and it replaces Terra’s ATB meter with a bar that slowly decreases, and when it fully depletes, Terra breaks free from her pixelated form and invades our mortal realm. Nah, Trance just ends.
To rebuild Trance, you need to gain Magic AP, the same resource you use to learn spells with Espers. I am now realising how much this makes sense in the lore. Funny how just writing things out at 6am teaches you new things.
What Trance does is quite simple. Your offensive stats are doubled, so the damage you deal is doubled, while you take half magic damage. This is fantastic all the way until you get Ultima, where you’re probably already dealing 9999 per cast anyway, and is why she gets a higher rating than Celes.
Trance/Morph is also notable as being the only ability Gogo can’t copy.
Beyond that, I actually don’t have anything else to say about Terra. She is woman, she uses woman equipment, which as covered with Celes, is the best equipment in the game. Other than that, she doesn’t do anything different from Celes. Woman cast magic. Magic good.
S Tier
There’s only one character left. I didn’t really bother being subtle about who it was, and there is really no argument to the contrary unless you want to factor in the level of annoyance of getting him to this point.
#1 Gau

Gau is unfortunately the best character in the game.
Gau’s whole thing is Rage. And I mean his whole thing, he doesn’t have access to an Attack button.
Why I say unfortunately is that the effort required to get Rage into the state where it’s the best ability in the game is quite an annoying time sink. On the Veldt, you gain access to most random encounters (and some not so random encounters) you’ve encountered thus far. Then, you can Leap, and when you do, you learn the Rage of the monster.
When you Rage, Gau’s script changes and becomes uncontrollable. He gains the resistances/immunities of the monster he’s Raging, and he has a 50% chance of doing a normal attack, and a 50% chance of doing a pre-determined ability based on the monster he Raged on.
Let’s cover the non-Rage aspects first. Gau can use Magic, but he’s obviously worse than the girls at it. He doesn’t have a good Magic stat at all, and caring about Magic on him defeats the purpose of even using him, so we’re not bothering here.
Now equipment. He gets access to the Snow Scarf, meaning he can hit the dreaded 255 Defense. Remember that you can do the thing you do with Master’s Scroll and/or Soul of Thamasa, and move the Snow Scarf around between parties. Remember that Rage inherits immunities/resistances, so if you know what elements the enemy utilizes, you could essentially just be immortal as long as they don’t have something like Ultima, which although I do mention it a lot, is used by a very miniscule amount of enemies.
Okay, Rage. In the first half of the game, with the exception of maybe Mog, it’s your best source of damage, period, and you have Gau for a very large portion of the game. Guard Leader gives you Wind Slash, after which you upgrade to Litwor Chicken for Quake, both of which just end the fight at the stage of which you have them. Anguiform gives Aqua Breath for a part of the game where all enemies are weak to Water, and Aspiran gives you Gigavolt which does absurd single target damage and is capable of immediately ending BOSS FIGHTS if it goes off. It doesn’t even end there, but I’d lose my mind if I mentioned every single option available to him.
The second half of the game is where it gets a bit more contentious. The raw damage output of Rage starts to lose out to Magic, Jump and Master’s Scroll here, but this is also where he gets the Snow Scarf, meaning if you have knowledge of the encounter, you can just win most combats as long as they have no way of circumventing your resistances. You can even just Rage Magic Urn, which gives you absorption of all elements. The 50% ability there is Curaga, so if you do end up in a situation where Gau is the only one standing, go out and have a nice steak dinner. By the time you’re back, the fight might be over.
Now let’s talk about exploits! Except this isn’t really an exploit, just something you can abuse because the game’s code allows it for… some reason. This is the Rage of the Rafflesia, which gives you access to Entice. What Entice is, in sparknotes, is the Confuse status, that ignores resistances. This means you can inflict Entice on bosses. Not only that, it doesn’t break when you hit them with a physical attack; it only breaks if Gau dies. This breaks all bosses, ruins the fun of the game, and is not a factor in the evaluation of Gau being this high.
Another one that isn’t so much an exploit moreso something that’s just a thing you can do in the SNES version of the game is the infamous Wind God Gau. Here, you give Gau a Merit Award. The Merit Award is a Relic that allows you to equip most other equipment that the character would normally be able to, although it doesn’t give male characters access to the aforementioned woman equipment, for example. In this version and only this version of the game, it also gives Gau access to equipping a weapon, something he normally cannot do. What you do now is give Gau the Kazekiri, Cyan’s weapon that if you recall, had a chance of using Wind Slash on attack. Then you equip the Master’s Scroll on Gau, so he attacks four times. Lastly, you use the Stray Cat Rage, which gives a chance of Cat Scratch, which is just a regular attack with 4x damage, and yes, that applies to Wind Slash. This actually turns Gau into the best damage dealer in the second half of the game and is honestly just absurdly hilarious to imagine.
Also, I’m not using the SNES names for any of the items. I’d give a witty reason for it, but the simple truth is that it’s just not what I grew up with. Haha, you’re old!
Gau essentially rewards knowledge of the game, and when you have that knowledge, he’s the best character in the game. You don’t actually ever need four characters to clear an encounter, since one or two Ultimas almost always end it. Gau is the Ultima in the first half of the game, and is your safety net utility in the second half.
This is where I have to mention that just because he’s the best, you don’t have to use him. I’ll easily admit that I don’t, for no other reason than I don’t want to go through the hassle, especially with the annoying system of the Veldt’s rotation that I don’t want to go through here since recounting it would make me want to smash my GBA into the rectum of an elephant.
Final Tier List

And that’s the list!
You probably disagree with multiple of the placements, and that’s fine! We’re all allowed to be wrong!
That’s a joke. The actual fact is that playstyles do ultimately differ, especially in a game as open-ended as FFVI, and you may know some super secret Cyan tech lost and forgotten to time. No, Quick Bushido is not a tech.
l’d think it’s quite nice that the game is fairly balanced, given its age. Perhaps it’s not the Final Fantasy game that aged the greatest in terms of gameplay, but I’d like to allude that to society’s loss of appreciation of the pixel genre.
Of interesting coincidental note, A Tier is just multiple different versions of the same character. Edgar and Mog, Locke and Setzer, then all the three girls are essentially just spellcasters. Hmm.
Now, take this list as gospel, go forth, and spread misinformation throughout the lands!


Leave a comment